Helldivers 2 Best Loadout: A Different Kit for Every Faction (Not Just One)
Stop bringing the same four stratagems to every mission. Here's what actually works against Terminids, Automatons, and Illuminate, and why.

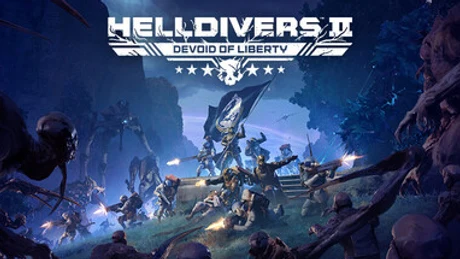
The helldivers 2 best loadout depends entirely on which faction you're deploying against, and treating it as one universal kit is the single biggest reason squads wipe on higher difficulties. Against Terminids you need crowd control and burn damage; against Automatons you need precision and anti-armor; against Illuminate you need answers to shields and teleporting elites. Below is the exact stratagem and weapon split for each, built from official stratagem data and cross-referenced community loadout performance across all three fronts on Helldive difficulty. The same class-setup logic carries over to other squad-driven shooters — see our Modern Warfare 4 beta coverage for what changes and what doesn't when the game shifts to Call of Duty's loadout system, or our Call of Duty: Mobile beginner loadout guide if the same decision-making applies to a touchscreen setup instead.
Against Terminids: Burn the Swarm, Don't Just Shoot It
Bugs come in waves, not lines, so single-target precision weapons underperform here compared to anything with area coverage.
- Primary: Incendiary Breaker. The DoT stacks on Hunters and Warriors faster than you can land follow-up shots with most other primaries, and it clears Bile Spewer nests without needing to circle-strafe.
- Support weapon: Quasar Cannon. No ammo box, no reload animation — just a 15-second recharge — which matters against Chargers and Bile Titans because you're rarely near a Resupply pod when one spawns on you mid-objective.
- Stratagems: Orbital Napalm Barrage for bug breaches, a Gatling Sentry to hold a flank while your squad extracts samples, and 500kg Bomb reserved specifically for Bile Titans (two direct hits kill one outright; one hit plus a Quasar shot to the head also works if the bomb lands slightly off-center).
- Backpack: Skip the shield in bug fights. Bring Supply Pack instead — Terminid swarms burn through primary ammo far faster than Automaton fights do, and running dry mid-breach is how a four-person squad becomes a one-person squad.
Against Automatons: Precision and Cover Discipline
Bots have ranged accuracy and armor, which flips the priority list entirely — you want penetration and range over area damage.
- Primary: Diligence Counter Sniper. It one-shots unshielded Devastators to the head from further than their rocket-lock range, which lets you thin a bot drop before it's close enough to pin you.
- Support weapon: Autocannon. It's the one weapon in the game that handles Hulks, Tanks, and dropships without a loadout swap — two shots to a Hulk's eye vent drops it, and it back-strikes Tank weak points cleanly.
- Stratagems: Orbital Railcannon Strike for anything with a visible weak point you can't reach (Tank turrets, Factory Striders), Eagle 500kg for cleared drop zones, and a Shield Generator Pack backpack — Automatons' hitscan weapons punish being caught in the open far more than bug claws do.
- Terrain tip: Automatons don't path around cover the way Terminids swarm through it. Fighting from behind rock formations near an objective, rather than in the open, cuts incoming damage more than any stratagem choice will.
Against Illuminate: Shields Change Everything
Illuminate forces layer energy shields on their elites, which makes raw damage-per-second less relevant than shield-stripping tools.
- Primary: Plasma Purifier. Its charged shot ignores small shields outright and staggers Overseers before they can trigger their teleport dodge.
- Support weapon: Arc Thrower. It chains through grouped Voteless and ignores their shields on the second hit in a chain, which single-target weapons can't replicate efficiently.
- Stratagems: Orbital EMS Strike to lock down a Harvester's legs before it opens fire, and a Machine Gun Sentry to handle Voteless crowds while your squad focuses shielded elites.
Where the Siege Breakers Warbond Weapons Actually Fit
Two newer weapons from the Siege Breakers Warbond come up constantly in loadout questions, and the honest answer for both depends entirely on which faction you're facing — same logic as everything else above.
- CQC-20 Breaching Hammer: this explosive melee stratagem is strong against both Terminids and Automatons — it one-shots Chargers, drops Hulks with a center-mass hit, and destroys Automaton Fabricators outright. It performs poorly against Illuminate, though: it's built as a one-hit anti-armor tool, and Illuminate units are lighter and more numerous, so a rapid-fire weapon beats a single heavy swing every time.
- LAS-13 Trident: effective at close range against large groups of lightly armored enemies, but its wide spread makes it weak at hitting small weak points from a distance, and its light armor penetration struggles against anything heavily armored. That combination makes Automatons its worst matchup — Devastators demand precise headshots at range, and heavier bot units shrug off its lower penetration.
Gear That Actually Matters Off the Battlefield
None of these loadouts save a squad that can't hear each other over gunfire. A dedicated headset with clear mic pickup for calling out Charger flanks or Hulk rocket tells matters more than people give it credit for — the HyperX Cloud Stinger is what I run for squad callouts since it isolates directional gunfire well enough to still hear a teammate over an Orbital Barrage. If you're playing on PS5 rather than PC, a spare DualSense controller is worth keeping charged for drop-in co-op sessions, since the game's adaptive trigger feedback on the Autocannon and Recoilless Rifle reload is genuinely useful for timing reloads without watching the animation.
The Real Takeaway
There is no single best loadout in Helldivers 2 — there's a best loadout per front, and the squads that clear Helldive difficulty consistently are the ones who swap kits between missions instead of running the same four stratagems everywhere. Learn the three splits above, adjust ammo counts to your play style, and the difficulty spike between fronts stops feeling like a wall and starts feeling like a puzzle with a known answer.
FAQ
Why not just bring one loadout to every mission?
Should I always bring a shield backpack?
Does my headset or controller actually matter for these loadouts?
What's the most common mistake these three splits fix?
Which faction is the Breaching Hammer best against?
What's the worst faction matchup for the LAS-13 Trident?

Covers RPG and live-service guides for VoxRig, building every build and loadout around official patch notes, in-game data, and community-verified strategies — not summarized from a single source.